| WrapMap |
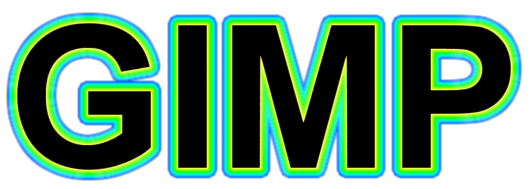
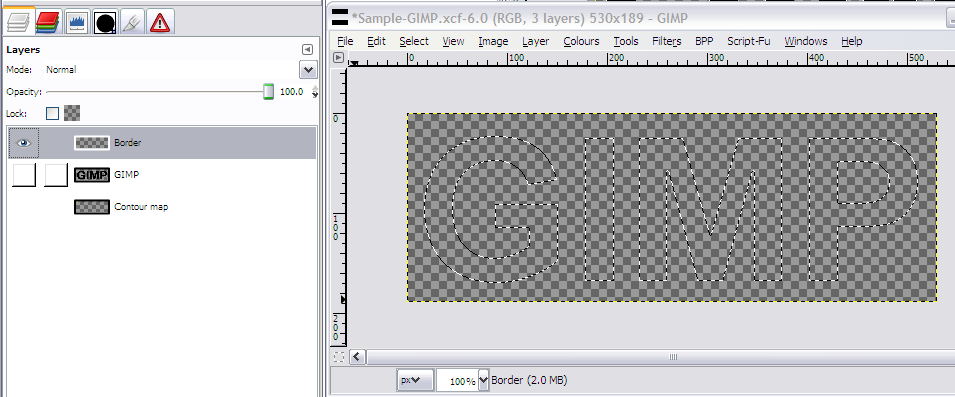
WrapMap is a Python plugin for Gimp that wraps a user-defined border around a shape (determined by the selection). For instance, given this shape (obtained by a text-to-selection):

and a border defined as (enlarged 10x here):

it produces:
There are at least three identified uses:
Your imagination is the limit
Get the python module here and copy it to your Gimp plugin installation directory, normally, either:
{your Gimp installation directory}/lib/gimp/2.0/plug-ins for a public installation (available to all users){your user profile}/.gimp-2.6/plug-ins for an individual installation.On Unix platforms, don't forget to set the executable bit (requires root if you do it in the Gimp installation directory).
Once GIMP is started (or restarted) menu entry should appear here:
The sample image used in this write-up can be retrieved here.
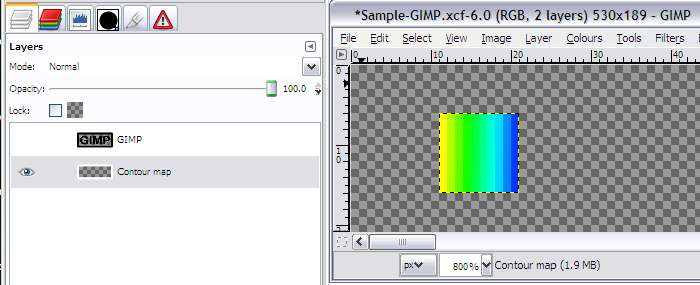
The map is a layer that is exactly as wide at the border you want to add. It can be as high as you want, make it high enough so that you get a vision of what the things will look like, but keep in mind that the filter will only use the top row of pixels. In the exemple we use a 10x10 gradient from pure yellow to pure blue, generated with the gradient tool:
This layer doesn't need to be in the image where you want to add the border. It can of course be kept in the same image, which makes it easier to save/load, but can also be in a separate picture which avoids some playing with visibility and zoom ratio (you may also keep a library of your favourite borders that way, as layers in an image).
The shape is merely the current selection, so anything that produces a selection is game. Here we are going to to a select by color on the "GIMP" layer.
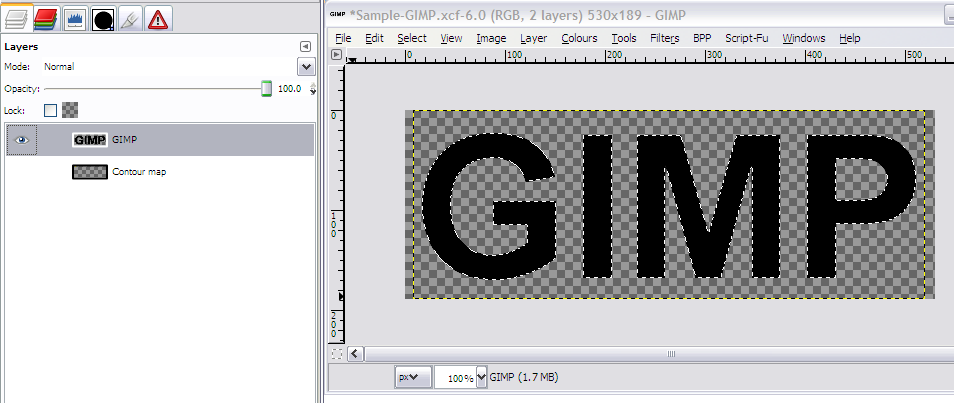
The border is drawn on the active "drawable", which is either a layer (the usual case) or a layer mask. Here we create a new layer to receive the border.
Note that the layer is selected as the active layer in the layers dialog, so that's where things wil happen next
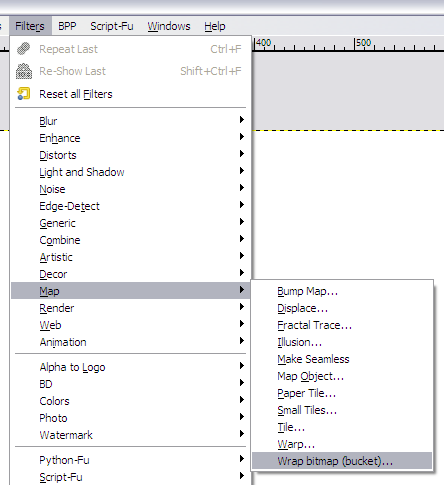
We can now start the filter y clicking on "Filters/Map/Wrap bitmap". The following dialog appears:
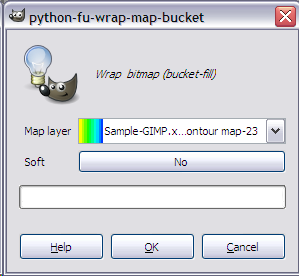
Two parameters are required:
Click "OK" and let it work:
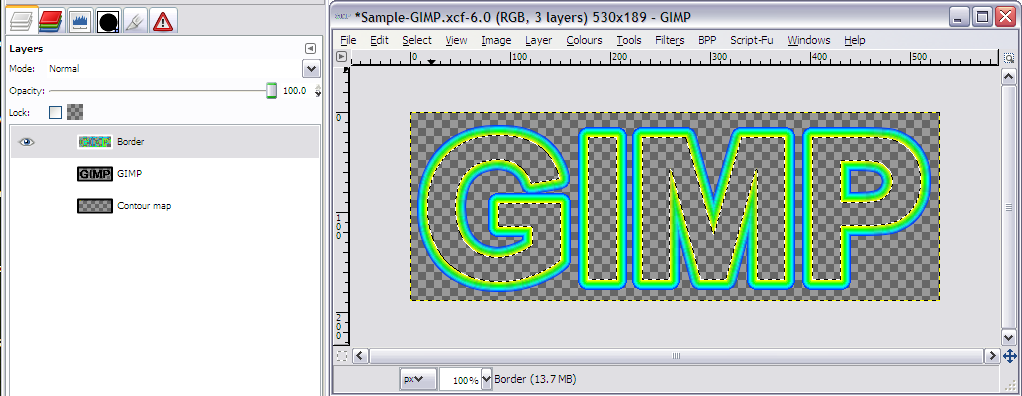
And we are done.
When using the "soft" parameter, a 2x2 final gaussian blur is performed after increasing the selection by one pixel outside the border. If the target drawable includes other images feature (such as the shape used) then these features will be taken in account in the blur.
To draw inside the shape, just invert the selection.
The leftmost pixel of the map is the one drawn closer to the selection.
If your selection has sharp angles (45 degrees or less) or pointy bits and is feathered, there may be a gap in the painting along the sharp areas. Use Selection/Sharpen to remove the feathering and make WrapMap behave correctly.Ask questions on gimp-forum.net.
This plugin has been developed on Windows (
This plugin is for GIMP 2.6. Tests on 2.7 gladly accepted.
This is:
... so don't expect miracles...
This plugin is fairly slow, any good suggestions to make it faster will be considered (though a rewrite in C is not in the foreseeable future). I have a slightly faster version that use selection strokes, but it has other problems.